"Getting into Pictures" in Photoshop, Pt. 4
This is Part 4 of a 5-part series.
The next step is to fine-tune the matchup between Jane's face and Mona Lisa's hair. We'll do this using two new techniques. Free Transform, to resize and reposition the face. And adjusting the opacity of the top layer temporarily, so we can see through to the background for precision in positioning. We'll finish painting the layer mask once we've got the face in exactly the right place and know what bits to mask out.
So, make sure that the top layer (Jane) is active by clicking on it in the Layers palette. Then select Edit > Free Transform. You now see a sizing rectangle with "handles" on it that you can do all kinds of transformations with. The three we'll use are:
1) rotation - position the mouse anywhere outside of the rectangle, and the pointer becomes a double-headed arrow which you can drag in a rotational direction to turn the layer image about its center point; you can drag that center point around if you want to move the point of rotation to somewhere else
2) scaling - drag from one of the corner handles to make the image smaller or larger; make sure you hold down the Shift key while doing this, as that will maintain the aspect ratio and prevent distortion
3) moving - click anywhere inside the rectangle (except on the center point) and drag to reposition the image
Once you have done all the rotating, scaling, and moving that you want, press Enter or click the checkmark icon (the Commit button) on the options toolbar to commit these changes.
Using those three techniques, now do the best you can to position the face over the background and make it match the size of the place where it's going to fit in. If you mess up at any point along the way, you can undo one step of the changes by presing Ctrl+Z or cancel out of them entirely by pressing Escape.
If you find that scaling the face larger makes its resolution too poor, you can alternatively resize the background layer smaller to fit, using the same method. You might need to zoom out using Ctrl+0 to be able to see the sizing handles in this case.
In positioning the face, you might find that you can't see the background well enough to get the position exactly right, because too much of it is obscured with the stuff surrounding the face in the top layer which you haven't masked out yet. It's kind of a Catch-22. You don't know what to mask out until you've got it positioned right. Here is where adjusting the opacity comes into play. At the top of the Layers palette are a bunch of controls, including Opacity (set to 100% by default). With the face layer selected, click the dropdown arrow next to Opacity, and drag the slider to somewhere much lower, perhaps 20 to 50%, whatever works best for you given the colors of the images you're working with, so that you can still see enough of the top layer to work with it, but enough of the background to position the face accurately.
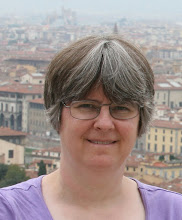
When you go back to working on the mask, set the opacity back to 100%. You might need to iterate back and forth between these two stages a couple of times to get everything just right. As I mentioned in an earlier lesson, set the brush to a smaller diameter and its hardness down to 0% when doing the precision mask work near the edges of where the face will finally meet up with its background. And zoom in to a greater magnification (Ctrl++) so you can see what you're doing. I tried to get the proportions of Jane's features to match those of Mona Lisa (impossible to do it perfectly since ML's chin is so small). And I lined up her cheek line and neck, not worrying too much about the hair line. Then I masked out the rest of the background. The images in this post show where I've gotten so far, in two intermediate stages -- first with opacity of the face layer set to 70% after I'd positioned the face, but before I'd finished painting the mask, and the second back at 100% after masking.
All we have left to do now is fix up Jane's skin tone to match the painting, and do a better job of blending the hair and the place where their necks join. That's for next time.
Go on to Part 5.


No comments:
Post a Comment