"Getting into Pictures" in Photoshop, Pt. 2
This is Part 2 of a 5-part series.
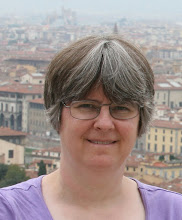
The next step is to get the two pictures together into one Photoshop (.PSD) file in two different layers, in order to be able to work with them. To do that, open both files (which you presumably have in JPG format) in Photoshop. I like to use the image that's going to form the background as the "working file" so we're going to drag the other image into it as follows: Position the windows so that you can see them both next to each other. Select the "Move" tool (![]() ) in the upper right corner of the Tools palette. Click on the photo of the person you know, drag it into the image of the artwork background, and release the mouse button. Now immediately do File > Save As, and give it a new name, to save it as a PSD file and avoid accidentally overwriting the original artwork.
) in the upper right corner of the Tools palette. Click on the photo of the person you know, drag it into the image of the artwork background, and release the mouse button. Now immediately do File > Save As, and give it a new name, to save it as a PSD file and avoid accidentally overwriting the original artwork.
You now have a Photoshop file with two layers. Double-click on "Layer 1" in the Layers palette (which you can show via the Window menu if it isn't currently visible), and rename it something sensible, such as the name of the person whose photo it is (I'll call mine "Jane"). Double-click on "Background" in the layer right below that and the "New Layer" dialog will come up. Give it the name of the painting (in this case, I'll call mine "Mona Lisa"), and click OK. What this does, in addition to renaming the background, is it also unlocks that layer and makes it fully editable. Notice that the little lock icon disappeared to the right of the layer name after you OKed the "New Layer" dialog. Don't worry for now if the relative sizes of the images are way out of whack. We'll fix that in the next lesson. But I am going to do one more step here, and that's flip the image of Jane around the right way so that it will begin to match better the orientation of Mona Lisa's face. To do that, click in the Jane layer to select it, so that it's one that any subsequent layer-specific commands will apply to. Now choose Edit > Transform > Flip Horizontal. Save again, and we'll come back for more next time.
To the right is what I've got so far, and here's what my Layers palette looks like:
Go on to Part 3.


No comments:
Post a Comment